This is just a quick and probably not very pretty tour of how I make panels. All images on the page are thumbnails linking to larger images. I've tried to keep filesizes down.
Initial Layout
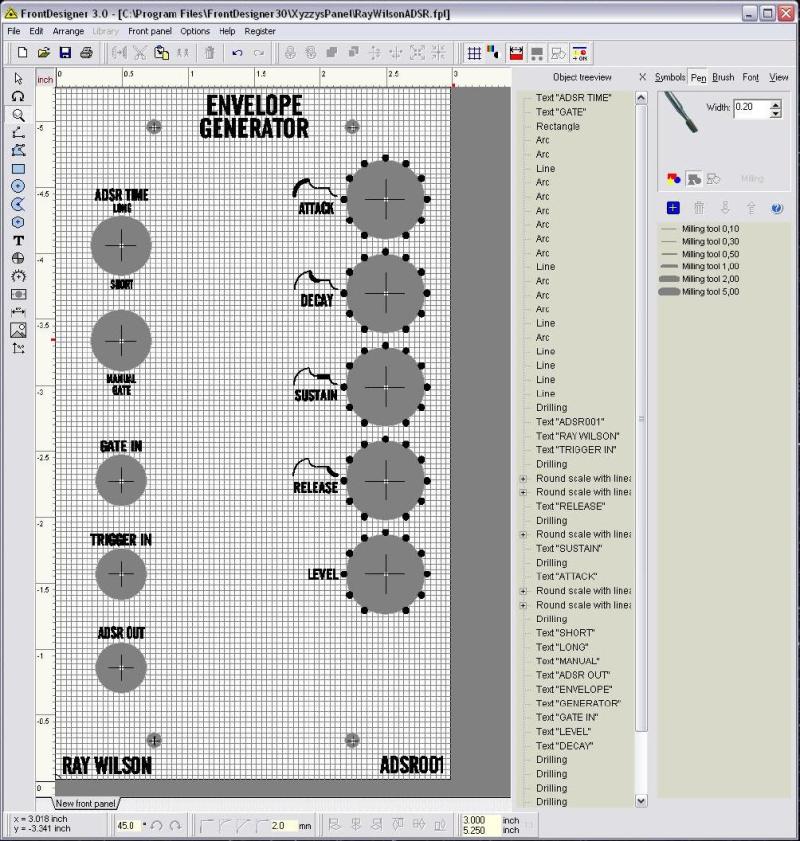
I of course start with what I want the panel to look like. In this case I am making panels for some Ray Wilson ADSRs that I've ordered. I generally like his panel layouts and graphics but I use FracRak so I'll steal design elements from his layout in this case ( the envelope graphics next to each knob which I recreated painfully with FrontDesigner's Arc tool ). For layout software I use FrontDesigner. I recommend buying it direct to save money vs the importers if you are ordering from inside the US. The software has some quirks like if you import a graphic then print a mirror image, the graphic prints normally so you have to flip the graphic *BEFORE* importing it. I havent tried this recently so maybe the latest update fixed it. In general though I am very happy with the software.
A quirk I have that people seem to notice is that I like to credit the board designer/supplier. Lower left corner in this case is "Ray Wilson", Lower right corner is the model of the board/module. I take liberties with the title at the top of the panel. For my font I use the same font as MOTM ( Alternate Gothic 2 BT ), not because I want to copy MOTM but because the font scales well and looks nice and clean even at small sizes. Choosing a font was harder then one might imagine.
I'm not a fan of overly complex knob graduations unless there is a real need for them so I use Blacet-Style dots but oriented vertically. This only has lead to problems once when I made a board using boardmounted panasonic pots. My solution then was to just order some properly oriented knobs because I really dont like the 5o'clock to 1o'clock rotation style.
| Here's the layout I came up with in FrontDesigner. | |
One thing to note that you might see later is that I have drawn alignment marks over top of the top and bottom mounting holes. This is because when printing the transparency I turn off printing the border and holes and I need a way to align the panel. I also make my holes Knob Size or Washer Size so I get a feel for exactly how the layout will fit. Since I only care where the holes actually are and not what their size is, this is fine. It would probably screw you up really badly if you were going to export your panel to HPGL to import into FrontPanelDesigner for ordering or something.
Printing
There is a bit of Black Art to printing transparencies. What I've found works best with my particular printer is leaving it at 600dpi, turning off toner-saver, and setting it for transparency printing. Your Mileage May Vary. It also seems to help to warm the printer up with a page or two before printing a transparency.
You'll want to print a normal copy with everything turned on and then print the transparency in mirror image with Holes and Border turned off. The reason you print a mirror image is so the toner side is directly against the panel being exposed so there is no light leakage around the edge of the printing.
| Here are my two printouts. On the left is my paper printout of course the right is my transparency. I'll use the paper print to centerpunch my blank panel | 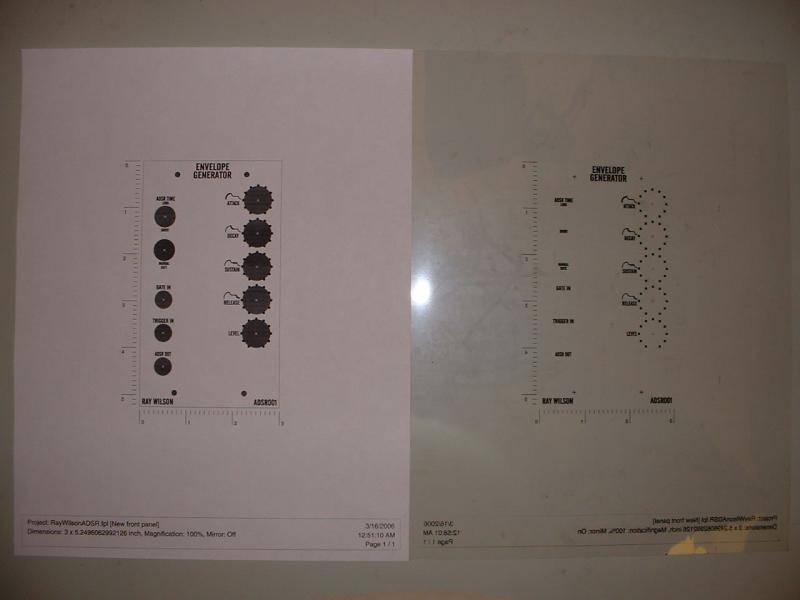 |
Panel Materials
For the label I use ID MARK from Horizons ISG. Its a photosensitive aluminum sheet. I use model 8701 which is 0.007" thick Black on Aluminum which comes as a 5 pack 12x20". I get the large size so I can do 19" wide panels. This costs about $125 for a pack and I get about 12 standard FracRak panels from a sheet or 60 per pack. I use a standard knife-type paper cutter to trim out rough blanks. I haven't had any trouble with accidental exposure as long as I stay away from direct light. No specials chemicals are required to develop these panels, just plain water unlike old 3M Dynamark.
I make the panel itself out of .063" 6061-T6 sheet aluminum. This is very rigid but still easy to drill ( or in my case punch ). I get my panels precut from Metal Supermarkets which is a fairly widespread chain in the US. I'm sure you can find someone local or you can order online from many sources.
When I use a board bracket, I use 0.50" 5052-H32. I buy this in 3" and 4" widths, 60" long. To form the metal I have a 7-1/2" Mini Brake/Shear which can be gotten from places like Harbor Freight or Grizzley for $100-$175 depending on specials. I also use this for trimming PCBoards. Works great for thin or soft materials but its definatly not a huge beast of a machine. This is a nice tool to have around because I can both trim the sheetmetal and form the right angle. Of course you could get your metal cut to size at the shop and then bend it in a vice just dont bend it too sharply or you could start to crack the metal.
Exposure
My exposure setup is very simple. I use two 48" BLB bulbs ( standard decorative blacklight bulbs ) in a cheap Workshop housing. I have a chunk of inch thick plastic I use as my definatly flat surface and a pane of 1/8" glass I lay across the transparency to keep it in contact with the ID MARK sheet. Its very important to have a flat surface and that the glass can lay perfectly flat. I expose for 8 minutes. I picked this time by taking a sample strip of ID MARK and exposing sections in increasing 1 minute increments up to 15 minutes. 6 to 10 minutes all worked okay, below that and all the material wiped off and above that detail was lost. This is the same setup and time range I use for exposing Positive PCBoards but that is another story.
| Here is my setup. Its in the back corner of my office just kind of stacked on the floor. I do intend to move this to the garage one day, really I do. | 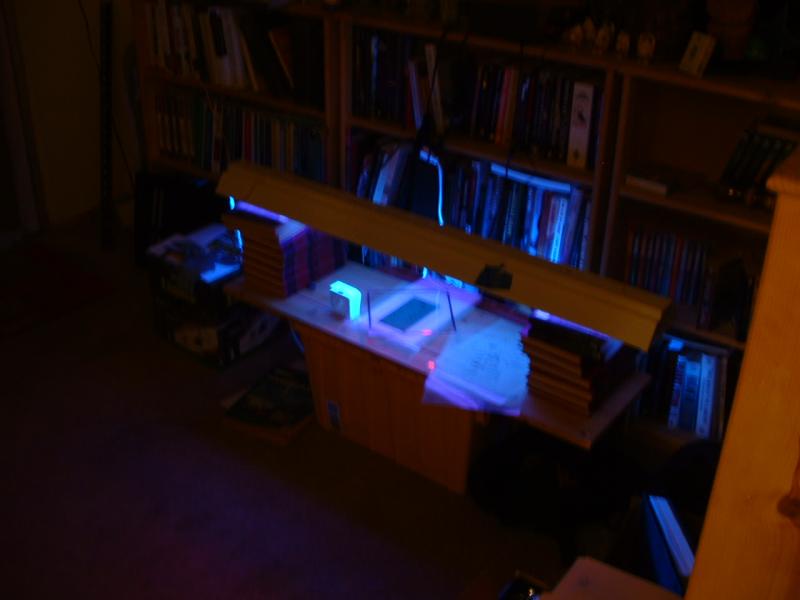 |
| Here is a closeup of actually exposing the ADSR panel. Thats a standard cheap kitchen timer. I edged the glass with aluminum tape, and the red light is a small pcboard with a bunch of LEDs on it I use as my safelight for alignment. | 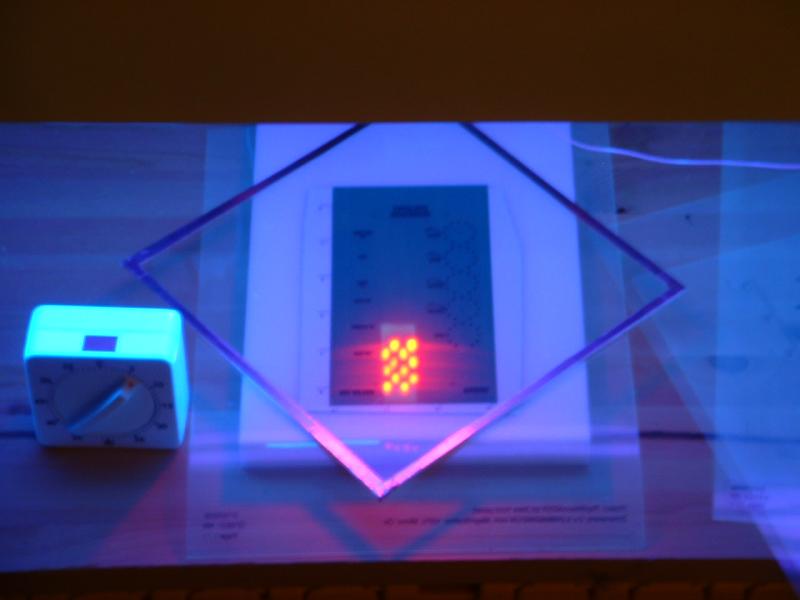 |
Developing The Panel
I didnt bother taking pictures of actually wiping off the panel. The process is incredably simple. I use cotton makeup wipes. They have a minor drawback of leaving lint everywhere but thats easy to deal with. Just soak the wipe in plain water and use it to apply a thin layer of water to the panel. Let it sit for a few seconds and then carefully start to wipe the panel down. You'll see the image start to appear and you can just monitor its appearance to decide where and how much more you need to wipe. Once I'm satisfied with the result I use a hairdryer to dry the panel quickly. At this stage water can damage the panel so you want to get it dry reasonably quickly. No panic required but you dont want to pop out for lunch either.
| Here are my new ADSR panels freshly exposed and dried. Not much to say about it. I expose one, when its done I start the other exposing and then wander out to the garage to wipe off the one I just did. | 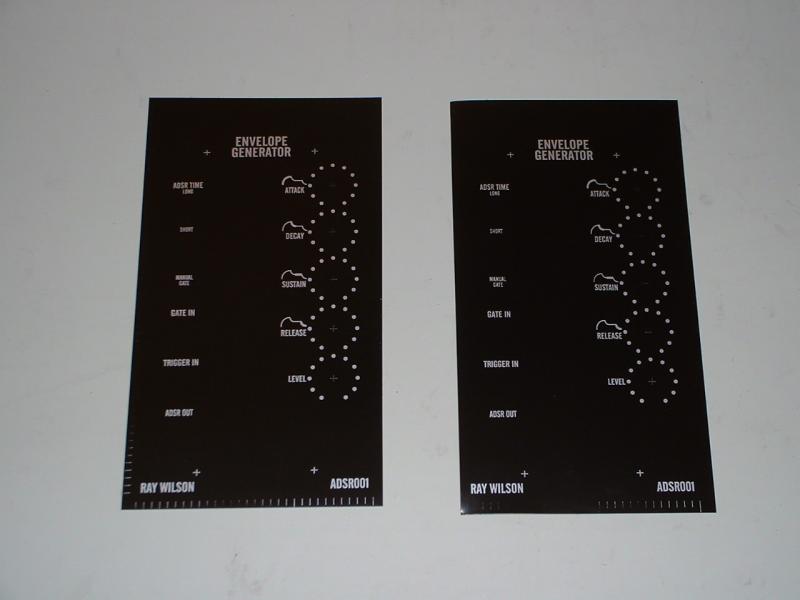 |
To protect the panels during assembly I apply a quick coat of lacquer. I personally like Deft satin finish spray laquer. It dries very quickly to a decent finish and behaves much more nicely then poly coatings, however USE IT WITH VENTILATION. Dust is your enemy at this stage and the faster something dries the less chance of dust also multiple coats of lacquer melt into each other so you can usually fix one bad coat with another carefully applied one. If there are any tiny imperfections ( dust on the glass during exposure? A light scratch because you tripped over the cat while carrying the panel? ) I have had good luck touching them up with a tiny brush using a sharpie as "paint".
While I was still using poly to coat panels I had limited success with creating a textured finish. I'd coat the panels with a couple coats of poly then get them good and hot with a heat lamp before applying a final coat with the spraycan a couple feet from the panel. When it worked it resulted in a finish that hid almost any imperfection/scratch and also resisted fingerprints, when it didn't the panel looked and felt like sandpaper.
| Here are the panels after my initial laquer coating. I just have them drying under a standard incandescent bulb at this point because I'm in no huge rush. If I'm in a rush I preheat with my heatlamp to Warm ( not too hot ) and then I can go through several coats in about 20 minutes. I tape the panels to this board to make it easier to hold why spraying and so I dont clearcoat my hands. | 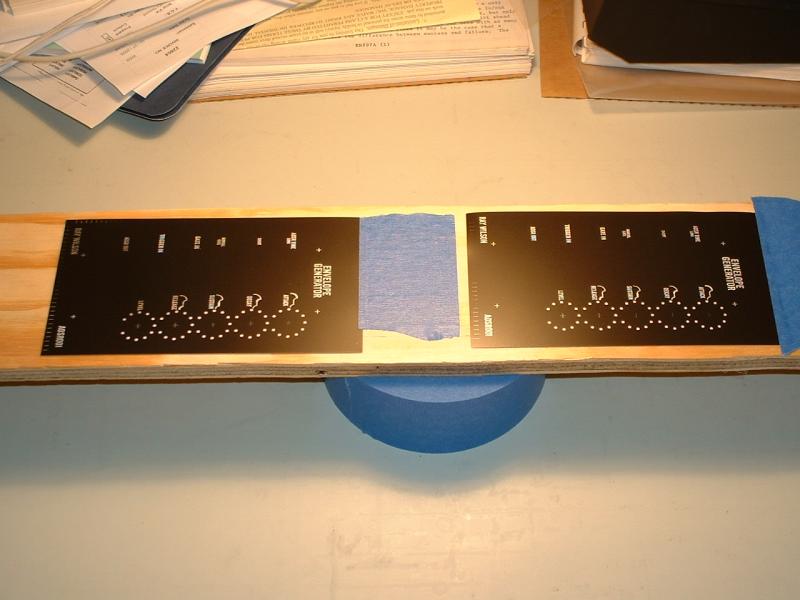 |
Panel Assembly
Now for a quick rundown of finally panel assembly.
Here is a label with alignment marks poked, one panel with holes centerpunched, and one panel fully punched. I use a punch since I have one, you can of course also use a drill with a little more care. When I say I have poked alignment holes I mean I've used an awl to poke a hole through the label so I can line it up. To centerpunch the panels I tape them to the back of that paper I printed out before the transparency and then just use an automatic center punch right through the paper. |
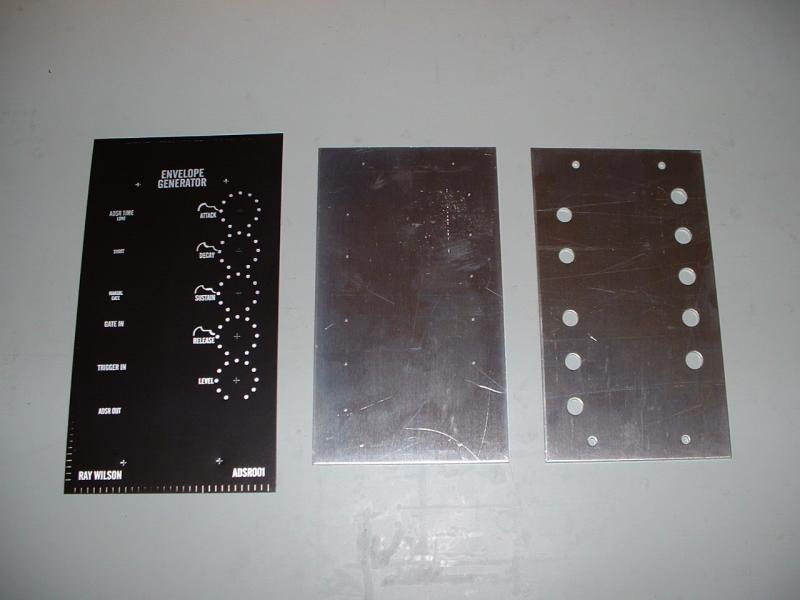 |
| Here you can see the alignment holes through the panel mounting holes from the back. This is right after applying the label to the front of the panel. Dont forget to wipe down the bare metal with alcohol or something to get oils and grease off. I have a board wrapped in black fabric that I place the label face down on for assembly. Keep it clean so you dont gouge up the panel. | 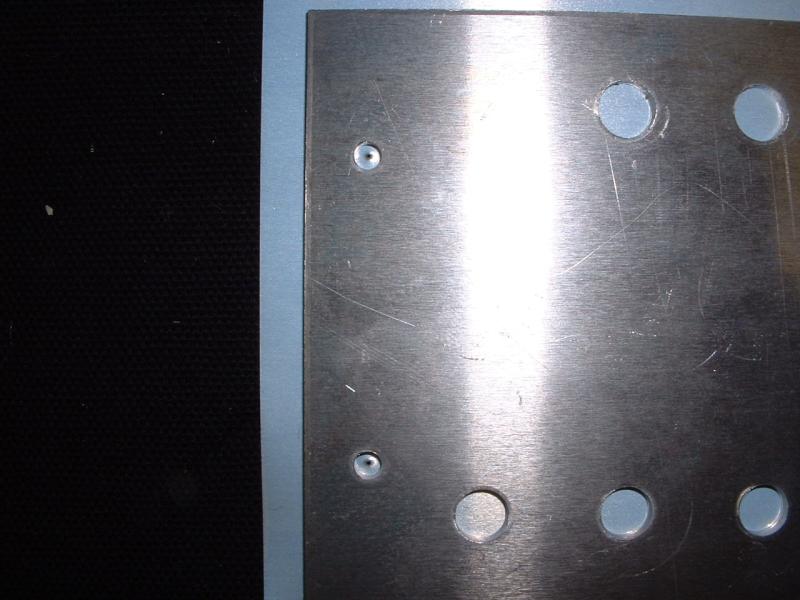 |
| After the label is applied, I tap the panel with a block of wood and a mallet to make sure the label is fully adherred. They have 3M adhesive on them so they stick quite well and quickly. I then score the label along the edges of the panel from the back with an x-acto knife and carefully rock the excess off the edges. A sharp bend from front to back and then gentle rocking and the label will crack cleanly. To make sure the edges are flat I carefully sand each edge with a piece of sandpaper stuck to my workbench ( shown here ). | 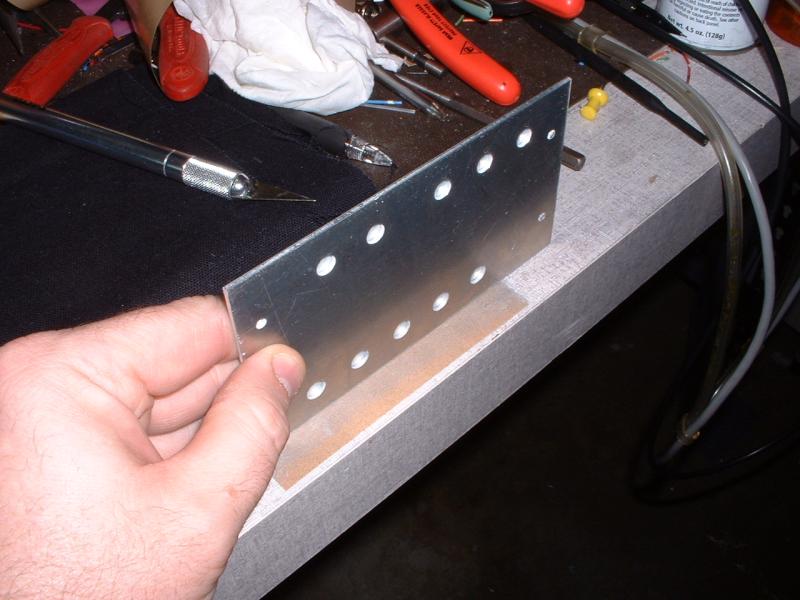 |
| Here I've cut some of the pot holes and punched out the mounting holes. To make the mounting holes or holes for LEDs where the edge is visible I use a 3mm or 5mm straight punch. If you push it thru the hole it makes a nice clean hole much like a hole punch does. You can easily align the punch by just gently pushing where the hole is located, this will leave a very slight indentation you can use for alignment. | 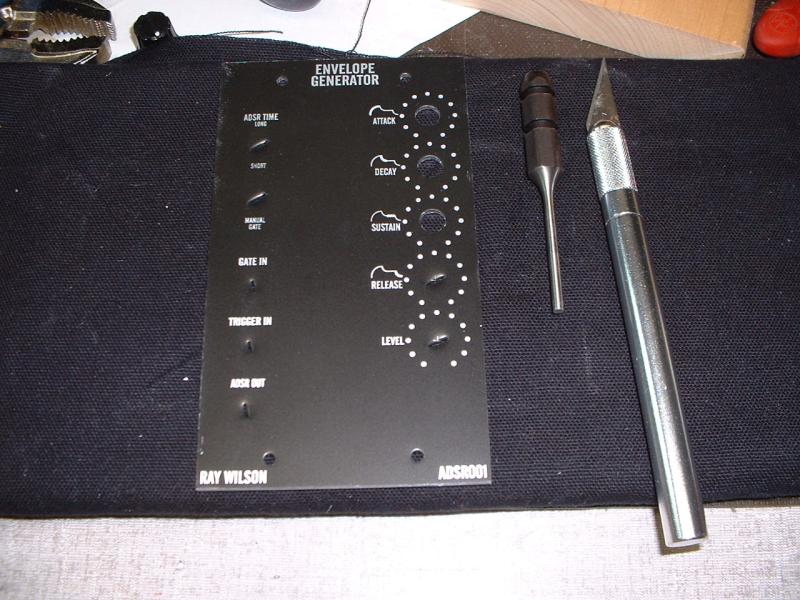 |
| The two panels ready for edge touchup and final lacquer. Next step to do is to go around the edge with a sharpie to cover any bright metal from possible view when installed, and then several coats of lacquer to protect the front and edge. | 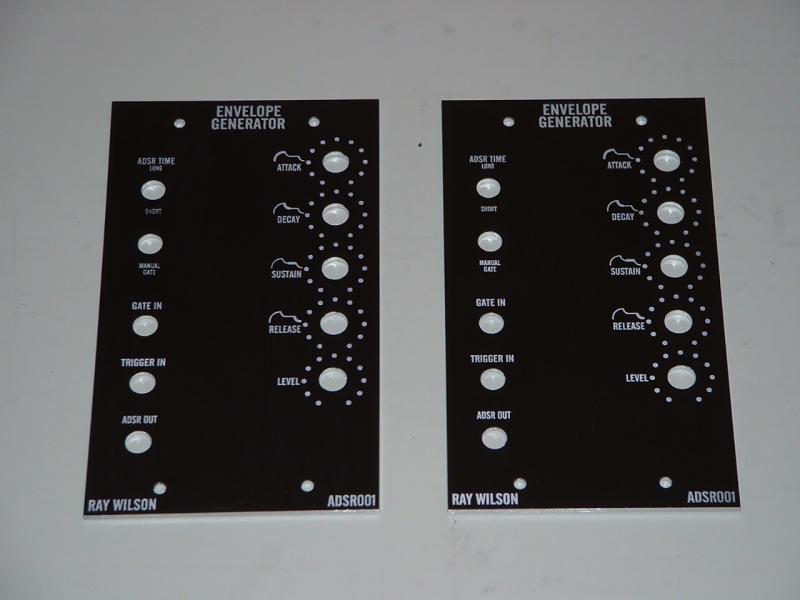 |
I haven't gotten my sheetmetal yet and I'm not expecting the ADSR boards for a few more days, so I'm going to show pictures from another set of Ray Wilson modules that I've completed, his VCA. These are still out of my FracRaks because I havent calibrated them yet so its easy to use them as examples.
| VCA back view. I usually use 16mm Alpha pots. The jacks are Kobiconn in this case however if I use the jacks to retain the bracket then I use Switchcraft because have a longer threaded shaft. The bracket the PCB is on is 5052 aluminum punched with Pot holes and PCB mounting holes then bent at a right angle and retained by the pots. | 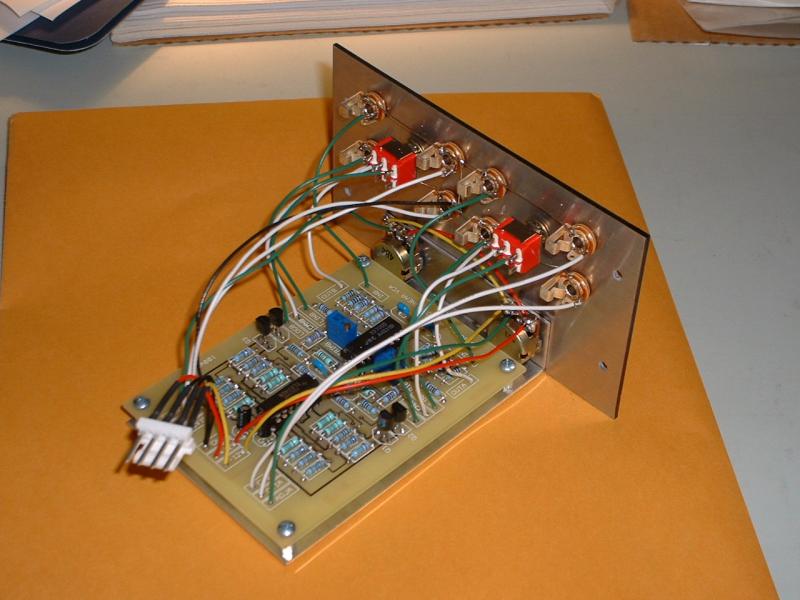 |
| Just a closeup of the bend. One thing to mention is I punch two holes for each pot. One hole for the shaft and then one hole for the anti-rotation pin which I trim so it doesnt protrude through the front of the bracket. | 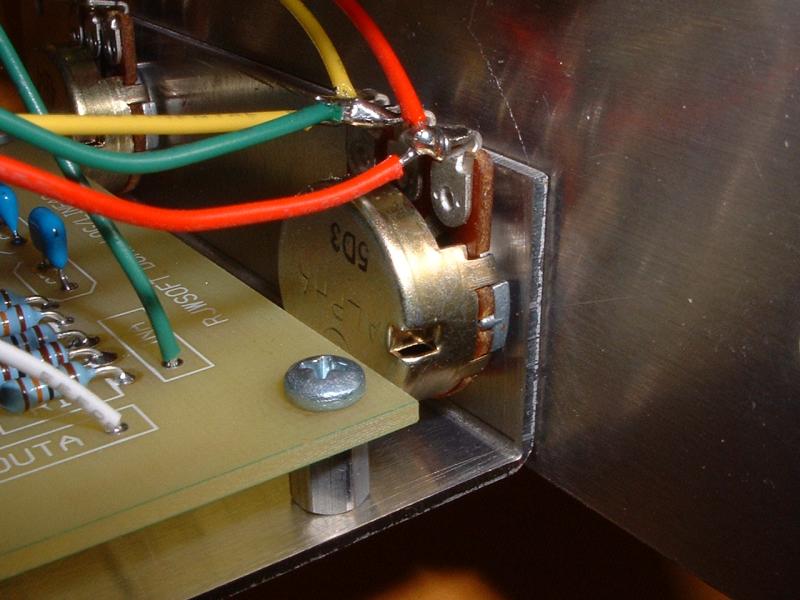 |
| And the completed VCA module. This particular panel I sprayed with Poly and actually got my "texture" finish correct. You can barely see the tops of the PCB retaining screws on the right. This is because I use Blacet spacing but the board is on the wrong side of the pots for it. With extra work I could use flat head screws and the imperfection would vanish, but it doesnt cause problems so I live with it. Another thing to note is above DLLVCA001 you can see where I touched up a scratch. |  |
Closing Remarks / Mindless Blathering
Well, thats it. A little closing commentary.
Cost? If you just count the materials cost amortized over one box of ID-MARK including the 6061-T6 panel, about $3 per panel. I'm amortizing a larger amount because I went tool-crazy ( I like tools ). I'm at about 1/2 to 1/3rd the cost of the same panels from Schaeffer. Cost is only part of it though. I have gone from inspiration/motivation to completed module in a night. That is something I couldn't begin to put a price on.
Quality? I think my latest batches of panels look quite tolerable. I remade the label on some of my early Poly coated ones. I noticed while taking pictures of my modules that some of the Poly ones have weird "crystaline" patches on some areas. They are only visible under the flash and don't show up otherwise so I wont bother replacing them. I really think lacquer is the best way to go. Its just easier to work with and "likes" the panel material more.
Other options? There are a bunch. I tried and didn't really like laminated paper. There is ID-MARK on some plastic sheeting that comes in colours which I thought looked a little too plastic and its really hard to trim the panel after application. Another method I tried which actually worked tolerably to a point is water transfer decals. They can be as complex as you want and look pretty good. The first drawback I found was alignment because you have to do them small and put them on as seperate labels. Thats actually not too hard to overcome. Air bubbles were easy enough to get rid of by just cooking the panel in an oven at low temperature. As far as the panel paint, well, I really hate painting so I had a local powder coating shop shoot the panels for me. Second drawback was making the edges of the labels disappear. To do that you need multiple coats of clear. Third drawback is that its difficult to do Light labels on a dark background, It can be done but its not fun. I do still use the water transfer labels for stomp boxes however I replaced the few module panels I created that way.
I personally think that Silkscreen on anodized metal looks the best and in theory I could do that myself if I didnt mind buckets of chemicals sitting around between anodizing runs. Also screens arnt cheap. $20 for a smallish screen, $15-20 additional for a screen-making service to make the screen or you could do it yourself but its messy. I'm not in module production ( yet! *evil laughter* ) but for large quantities I would definatly farm out front panels, probably getting the bulk raw panels produced by one company, anodized by a local business, and screened by another local business. Doing 20+ panels that way and the price starts to get reasonable.
MetalPhoto is another process I looked into. Color and contrast results are similar to ID-MARK. They are insanely scratch resistant because the graphics are anodized into the metal face. You can get MetalPhoto in .125" but the default metal is a little soft to go thinner on a panel ( its at least 5052-soft if not worse ). The biggest drawback is its a complex process and requires specialized equipment, plus you have to make holes after its developed and sealed. If I was someone doing bunches of custom one-off modules it would definatly be worth considering getting the cheapest metalphoto setup and a tabletop CNC router to cut out the panels but this would be a serious used-car sized investment and it would take many hundreds of one-off panels to make it worthwhile but man once you hit that point you'd be in heaven and probably also really sick of making panels...
I'm actually not a fan of the engraved look like Schaeffer. I have used Front Panel Express for my Oakley units and they do look good, but I actually like the look of ID-MARK better and Silkscreening still wins. One engraving method that does look very good to me is when the lines are filled. The process is basically engraving the panel then filling all the engravings with epoxy paint in your favorite colors. Once its hardened the panel is resurfaced and then anodized. The anodizing doesnt affect the epoxy so it still stands out. Note that this isnt the same thing that Schaeffer does, when I say filling the engravings I really mean it they are filled in like using bodyfiller on a car dent. One panel I've seen done like this the epoxy was mixed with long-life non-radioactive green glowing powder so that after a few minutes of charging all the labels would glow nicely in a dim environment. As a side note, this powder is available now with a few minutes of charge providing 20+ hours of glow. Check out Risk Reactor if that sounds like something you want to play with.
Well, I think I've beat this dead horse enough for now!
Tom Arnold / xyzzy@sysabend.org